
First-time setup
The order of things
- Create your organisation account on this website and choose a plan.
- Install the server on the venue PC.
- Sign in on that PC — this connects the server to your organisation.
- Run the setup wizard, which reads your board.
- Add musicians and invite them.
Steps 1 and 2 can happen in either order, but the server can't connect itself to an organisation that doesn't exist yet, so don't leave the account until last.
1. Create your organisation account
- Sign up with your own email address. The first person to sign up becomes an admin.
- Name your organisation when asked. This is what musicians see, and what your servers and subscription belong to.
- Choose a plan on the same page.
Everything about the account — admins, musicians, invitations, servers, billing — is covered in organisation account & billing.
2. Connect the server to your organisation
A newly installed server belongs to nobody. It joins your organisation the first time an admin signs in on it — there are no pairing codes to copy across.
- On the venue PC, open a browser and go to
http://localhost. - You'll see a Sign In card. Press it. The browser takes you to this website to sign in, then returns you to the app.
- That's it — the server is now attached to your organisation, and appears on the website's Servers page.
Sign in as an admin, on the PC itself
One organisation per server
3. Run the setup wizard
The first time you sign in on a new server, the wizard opens by itself. It has five steps and reads your channel and bus names straight off the board, so most of it is ticking boxes rather than typing.
You can leave at any point with Skip Setup and do the same work later in Settings — the wizard is a friendlier route to the same place, not a separate system.
Step 1 — Welcome
Nothing to do except make sure the X32 is powered on and on the same network. Press Get Started →.
Step 2 — Sound board connection
Press 🔍 Scan Network for Boards and pick yours from the list. If the scan finds nothing, use ✏️ Enter Board IP Manually — the address is on the board's own Setup → Network screen, and the port is 10023.
Wait for ✅ X32 Connected and Ready before continuing. Next → stays disabled until the board answers, because every step after this one is built from what it says.
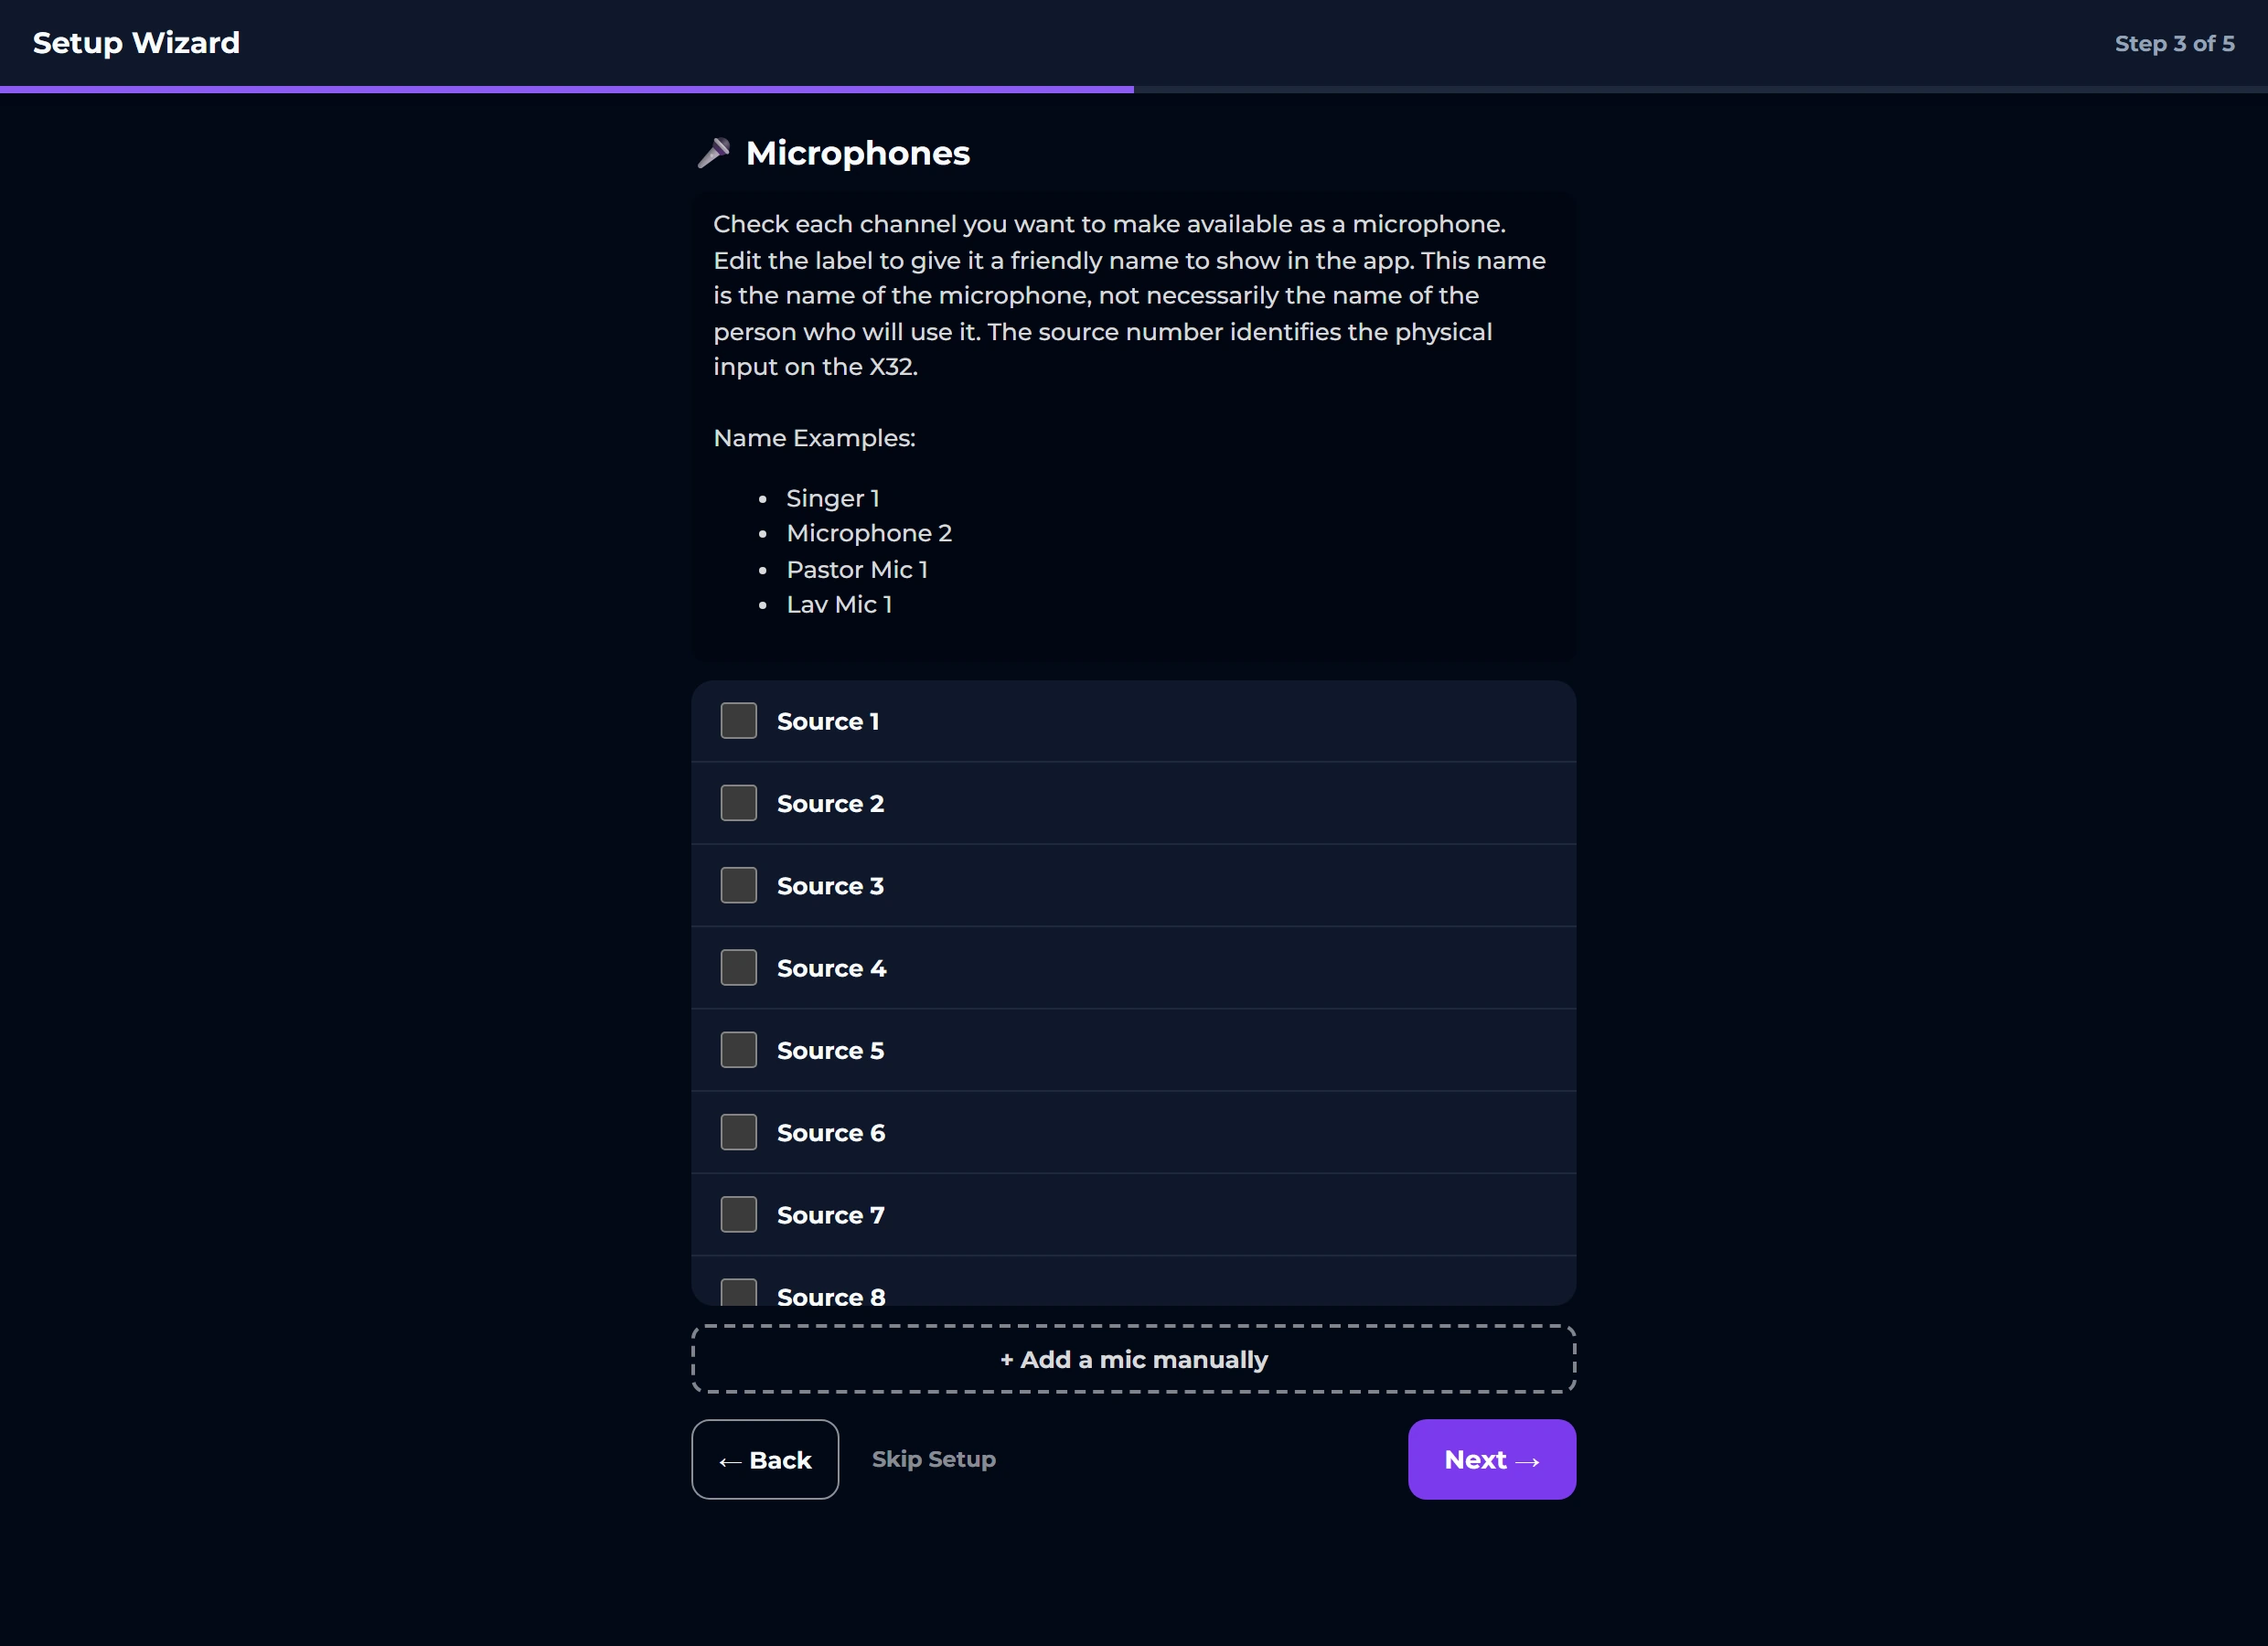
Step 3 — Microphones
Tick every channel you want to be able to hand to a musician, and give each one a label your volunteers will recognise.
- Name the microphone, not the person: “Wireless 3”, “Lav Mic 1”, “Lectern Mic”. People get assigned to these later, and they change every week.
- The number beside each one is the physical input on the board — the socket, not the channel strip.
- + Add a mic manually covers anything the board hasn't got a name for yet.
Step 4 — Monitor mixes
Tick the buses that feed in-ear packs and wedges, and label them so a musician can tell which is theirs: “Pack A”, “Drums Wedge”, “Podium Monitor”.
One bus per musician who needs their own mix. If two people share a wedge, that's one monitor and they share the mix too.
Step 5 — Non-mic sends
Everything else a musician might want in their ears: instruments, click, backing tracks, playback. Names are matched to the board's channel names exactly, which is why taking them from the board rather than typing them is worth doing.
Each one gets an icon guessed from its name — change it if the guess is wrong. Press Finish ✓.
The last screen summarises what you set up and drops you on the roster.
4. Add your musicians
Anyone with an account in your organisation appears on the roster automatically. For a first outing you'll usually do both of these:
| Invite them | ⋮→Invite Musician gives you a QR code and a link. They create an account and can then control their own mix. This is what you want for regulars. |
|---|---|
| Add them locally | ⋮→Add creates a roster entry with no account behind it. Fine for a guest musician on one night — you control their mix for them, and you can invite them properly later from the same entry. |
Then assign each person a microphone and a monitor, and build a starting mix for one of them — see the admin guide. Copy gets that mix onto the rest of the section in seconds, and every musician can adjust from there.
A good first rehearsal